How to Install a Qi Wireless Charger Seamlessly into Your Vehicle or Furniture
Introduction to Qi Wireless Charging
Qi wireless charging technology has revolutionized the way we power our devices. By using electromagnetic induction, Qi chargers provide a convenient and cable-free charging experience for compatible smartphones and accessories. Integrating a Qi wireless charger into your vehicle or furniture not only adds a modern touch but also enhances functionality and convenience. This comprehensive guide will walk you through the entire installation process, ensuring a seamless and professional result.
Understanding the Components and Requirements
Before diving into the installation, it's important to familiarize yourself with the essential components of a Qi wireless charger system. These include the charging pad (transmitter), a power source, wiring, and the receiving device. Additionally, you need to ensure the vehicle or furniture structure supports embedding a wireless charging solution. Knowing the power requirements, size constraints, and optimal placement will help you choose the right Qi charger model for your project.
Choosing the Right Qi Wireless Charger
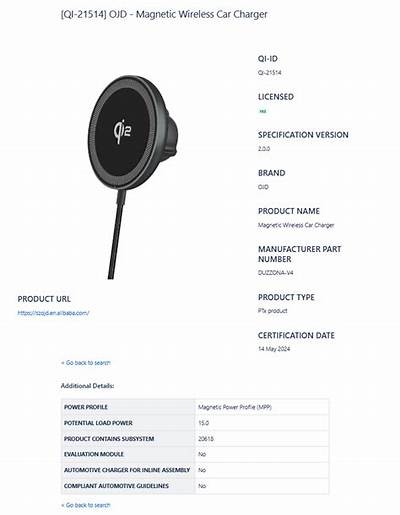
Qi chargers come in various designs, sizes, and power outputs. For vehicles, units designed to withstand vibrations, temperature changes, and power fluctuations are preferable. Furniture installations may allow for larger or more aesthetically integrated designs but require careful planning for power accessibility and ventilation. Opt for chargers with certifications such as Qi compliance, CE, or FCC to guarantee safety and efficiency.
Preparing Your Vehicle or Furniture for Installation
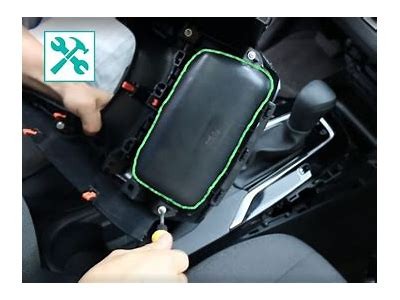
The first step in installation is preparing the surface where the charger will be embedded. For vehicles, typical locations include the center console, dashboard, or armrest. Measure and mark the area precisely to avoid damaging structural components or interfering with airbags and electronics.
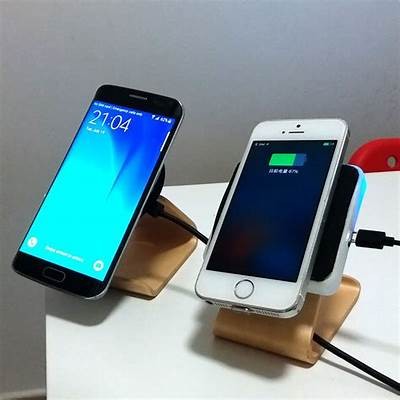
In furniture, popular areas include tabletops, desks, or nightstands. Ensure the surface material (wood, plastic, metal) can accommodate the charger and does not excessively block the electromagnetic field. Sometimes, you may need to create a recess or cutout to fit the charging pad flush or slightly below the surface for a sleek look.
Gathering Tools and Materials
Successful installation requires a set of tools and materials such as:
- Drill and drill bits
- Jigsaw or router (for precise cutouts)
- Measuring tape and marker
- Wire stripper and crimper
- Electrical connectors and heat shrink tubing
- Multimeter for electrical testing
- Adhesive or mounting hardware
- Protective gloves and eyewear
Having these tools on hand will streamline the process and reduce errors.
Wiring and Power Supply Integration
Qi chargers typically require a 5V or 9V power supply, often drawn from a USB or vehicle power system. In vehicles, connect the charger to an accessory power source that is only live when the ignition is on to prevent battery drain. For furniture installations, wiring can be connected to a nearby power outlet or internal power source.
Always use appropriate gauge wiring and fuse protection to maintain safety standards. Secure connections with soldering or crimp connectors, and insulate wire joins with heat shrink tubing. Run cables discreetly to avoid visible clutter and protect wiring from wear or sharp edges.
Cutting and Installing the Charging Pad
Once the location is selected and wiring completed, cut the designated area to fit the charging pad. Use precise measurements and the appropriate cutting tool for your material to avoid rough edges or damage. If embedding under a surface such as glass or thin wood, ensure the thickness does not impede charging efficiency; typically, 3-5mm thickness is optimal.
Secure the charger pad using the supplied adhesive or mounting hardware. Confirm the charger sits flush or slightly recessed for a clean look and user comfort. Avoid gluing or mounting in a way that traps heat, as excessive temperatures can degrade performance.
Testing the Installation
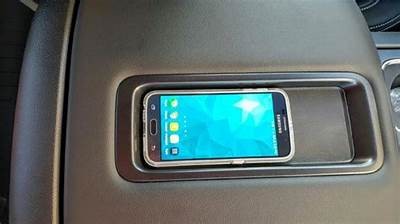
After installation, use a compatible smartphone or device to test the charger. Verify power delivery by checking that charging initiates automatically when the device is placed on the pad. Utilize a multimeter to ensure electrical connections are solid and the charger is receiving the correct voltage.
Monitor the charger and surrounding surfaces for any excessive heat or interference. If problems arise, re-check wiring and insulation, and confirm that no metallic objects or thick materials obstruct the electromagnetic field.
Enhancing the Finish and User Experience
To enhance the final appearance and user experience, consider concealing wiring with trim or panels that blend naturally with the vehicle or furniture interior. Adding LED indicators can help users identify when the charger is active. Optionally, integrating the charger with smart controls or power management systems can provide additional convenience and safety.
Maintenance and Troubleshooting Tips
Keep your Qi wireless charger clean and free from dust or debris, which can interfere with charging. Regularly inspect wiring connections for wear or damage, especially in vehicle installations that experience vibration and movement. If the charger fails to operate, re-test power supply voltage and confirm device compatibility.
Conclusion
Installing a Qi wireless charger into your vehicle or furniture is a rewarding upgrade that combines convenience with modern technology. By carefully selecting components, preparing the site, wiring safely, and testing thoroughly, you can achieve a seamless and professional-quality installation. Embrace the cable-free charging experience and enjoy the enhanced functionality of your space or vehicle.