How to Effectively Seal Your Balcony to Prevent Water Damage and Leaks
Introduction
Water damage is one of the most common and costly issues that homeowners face. When it comes to balconies, improper sealing can lead to leaks, structural damage, and even mold growth. In this guide, we will explore effective methods and materials for sealing your balcony, along with tips to prevent future water damage.
Understanding the Importance of Sealing
Before diving into specific methods, it's crucial to understand why sealing your balcony is important. A well-sealed balcony protects the underlying structure of your home and extends the life of the materials used in construction.

Common Risks Associated with Unsealed Balconies
Unsealed balconies can lead to various problems, including:
- Structural integrity issues
- Increased maintenance costs
- Mold and mildew growth
- Potential health risks
Assessing Your Balcony
Before embarking on sealing your balcony, it's essential to assess its current condition. Look for cracks, peeling paint, or any signs of water damage. Understanding the extent of these issues will help you decide on the best sealing approach.

Identifying Materials and Tools Needed
Once you've assessed your balcony, gather the necessary materials and tools. Common materials include waterproofing membranes, sealants, and caulking compounds. Tools may consist of brushes, rollers, and caulking guns.
Step-by-Step Guide to Sealing Your Balcony
To effectively seal your balcony, follow these step-by-step instructions:
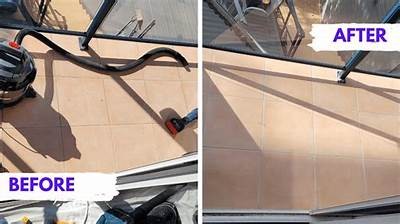
Step 1: Preparation
Start by cleaning the balcony surface thoroughly. Remove any dirt, debris, and existing loose paint. Ensuring the surface is clean will help the sealant adhere properly.
Step 2: Repairing Surface Damage
Fill any cracks or holes with an appropriate filler. For larger gaps, consider using a patching compound. Allow these repairs to dry completely before proceeding.
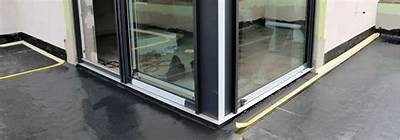
Step 3: Applying a Primer
For optimal results, apply a primer designed for waterproofing. This will enhance adhesion and improve the durability of the sealant.
Step 4: Choosing the Right Sealant
There are various sealants available, including acrylic, polyurethane, and rubberized coatings. Choose a product suitable for your climate and the material of your balcony.
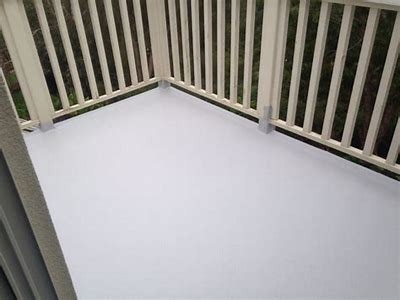
Step 5: Application
Using a roller or brush, apply the sealant evenly across the balcony. Make sure to cover all areas, including edges and corners. For best results, apply multiple coats as recommended by the manufacturer.
Step 6: Finishing Touches
After the final coat has dried, inspect the balcony for any missed spots. Touch up these areas to ensure complete coverage. Finally, allow the sealant to cure as per the manufacturer’s instructions.
Regular Maintenance and Inspections
To keep your balcony in good condition, perform regular inspections. Look for signs of wear, such as cracks or peeling sealant, and address these issues promptly. Cleaning your balcony regularly will also help maintain the sealant’s effectiveness.
Extending the Lifespan of Your Seal
Factors such as weather and foot traffic can impact your seal's durability. Take care to minimize damage by using furniture pads and limiting exposure to harsh conditions when possible.
Conclusion
Sealing your balcony is a vital part of maintaining your home’s integrity and preventing water damage. By following the steps outlined in this guide, you can ensure a durable seal that will protect your investment for years to come.
Call to Action
Don't wait for water damage to occur. Take the necessary steps today to seal your balcony effectively and safeguard your home. ```